Essential Embroidery Stitches for Beginners and Beyond
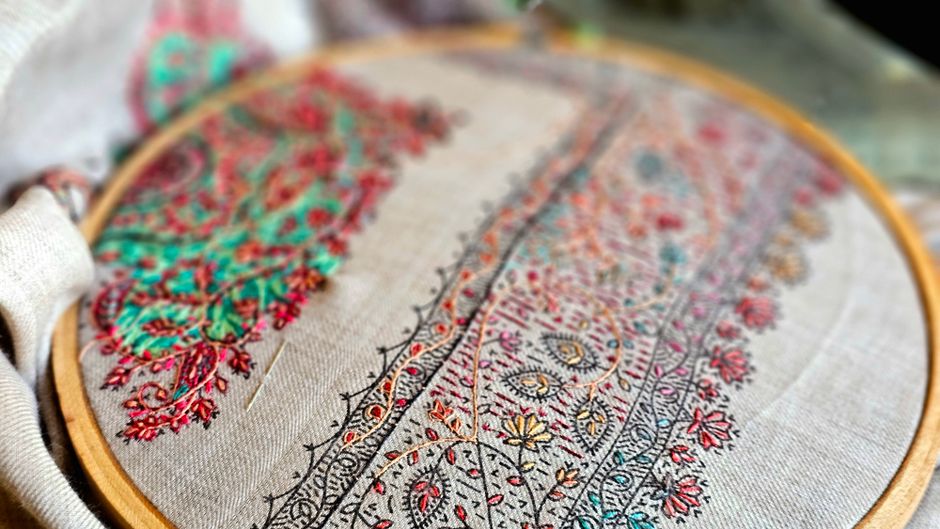
Embroidery offers a way to add texture, color, and personal detail to fabric using a needle, thread, and a handful of foundational techniques. For those new to the craft as well as those returning to it, understanding a few core stitches provides a versatile starting point. The backstitch, satin stitch, French knot, and chain stitch are frequently introduced in beginner resources because they can be combined in many ways and adapted to different projects. Each stitch has its own rhythm and visual character, and learning how they behave on various fabrics supports more informed choices over time.
Clear diagrams are a central part of learning these stitches. A well-drawn diagram shows the path of the needle, the direction of the thread, and the relationship between stitches. When paired with practice on scrap fabric, diagrams help build muscle memory. The information below outlines how each of these four stitches is formed, where it tends to work well, and how fabric choice may influence the final appearance. The goal is to provide a practical reference that supports experimentation rather than prescribing a single correct way to embroider.
Because embroidery involves many variables, including thread weight, fabric weave, needle size, and individual tension, the notes here are offered as general guidance. Results can differ from one project to another, and what works on one fabric may need adjustment on another. Approaching each stitch as a skill to be explored, rather than a fixed rule, tends to make the learning process more flexible and sustainable.
Backstitch: Structure and Line Work
The backstitch is one of the most direct ways to create a continuous line. It is worked by bringing the needle up through the fabric, then inserting it behind the previous stitch and pulling the thread through to form a linked line. This backward motion is what gives the stitch its name. Because the stitches connect closely, the result is a solid, defined line that can be used for outlines, lettering, stems, and borders. Unlike some decorative stitches, the backstitch prioritizes clarity and control, which makes it a frequent choice for details that need to read distinctly.
Diagrams for the backstitch typically show a sequence of steps rather than a single image. The first step shows the initial stitch, the second shows the needle returning to the midpoint of that stitch, and the third shows the completed line. Following this progression helps beginners see that the stitch is built incrementally. Practicing on a small square of fabric allows the embroiderer to observe how stitch length affects the line’s appearance. Shorter stitches can create a denser line, while slightly longer stitches may cover ground more quickly but may appear less solid depending on the thread and fabric.
Fabric choice influences how the backstitch sits on the surface. On tightly woven fabrics such as cotton or linen, the stitch tends to remain crisp and well-defined. On looser weaves, the thread may sink slightly or shift, which can soften the line or require a slightly different tension. Knit fabrics and stretchy materials can present additional considerations, because the fabric may move as the needle passes through. In those cases, some embroiderers use a stabilizer to support the fabric. The backstitch is also commonly used in combination with other stitches, serving as a foundation line that other elements are built around.
Satin Stitch: Smooth Filling and Shape
The satin stitch is used to fill areas with a smooth, flat layer of thread. It is worked by bringing the needle up along one edge of the shape and down along the opposite edge, then repeating the process side by side. The stitches lie parallel to one another, creating a glossy surface that can resemble the sheen of satin fabric. This quality makes it suitable for filling petals, leaves, small shapes, and geometric forms. Because the thread covers the fabric completely, the satin stitch is often chosen when a solid block of color or a clean edge is desired.
Diagrams for the satin stitch generally show a shape with evenly spaced vertical or angled stitches. The diagrams emphasize consistent spacing and consistent tension. If the stitches are too loose, the surface may appear uneven or the threads may separate; if they are too tight, the fabric may pucker. For beginners, starting with a small shape and working outward can make it easier to maintain even coverage. The direction of the stitches also matters. Stitches that follow the natural curve of a shape can enhance the shape’s form, while stitches that run against the curve may create a different visual effect.
Fabric selection plays a role in how the satin stitch performs. Smooth, tightly woven fabrics often allow the stitches to glide and lie flat. Textured fabrics, such as those with a pronounced weave, may cause the stitches to sit unevenly or create small gaps. On very fine fabrics, the weight of the thread can be a consideration, and a lighter thread may be preferable. On heavier fabrics, a slightly thicker thread may cover more efficiently. Because the satin stitch is a filling stitch, the size of the area being filled also matters. Very large areas can be challenging to cover evenly, and some embroiderers break them into smaller sections or combine the satin stitch with other techniques.
French Knot: Texture and Detail
The French knot is a compact, raised stitch that adds texture and a three-dimensional element to embroidery. It is formed by wrapping the thread around the needle one or more times and then inserting the needle back into the fabric near where it emerged. The result is a small, rounded knot that sits on the surface. French knots are often used for flower centers, eyes, berries, dotted patterns, and accents that benefit from a small, concentrated point of color. Because they are individual elements, they can be placed in clusters or spaced apart to create different effects.
Diagrams for the French knot usually show the thread wrapped around the needle and the needle reinserted close to the starting point. The number of wraps determines the size of the knot. A single wrap produces a smaller knot, while two or three wraps produce a larger one. Tension is a key variable. If the thread is pulled too tightly as the knot is formed, it may become difficult to slide the needle through; if it is too loose, the knot may not hold its shape. Practicing on a scrap of fabric helps develop a sense of the right tension. It is also common for beginners to find that the first few attempts are inconsistent, which is a normal part of learning.
Fabric choice can affect how French knots behave. On firmly woven fabrics, the knots tend to sit securely and maintain their shape. On fabrics with a looser weave, the knot may pull through slightly or sit lower on the surface. On delicate fabrics, care is needed to avoid distorting the weave. The thread weight also interacts with the fabric. A heavier thread may create a more pronounced knot, while a fine thread may produce a subtler one. Because French knots are often used as accents, they can be tested on a small sample before being added to a larger piece, allowing the embroiderer to see how they relate to the surrounding stitches.
Chain Stitch: Loops and Lines
The chain stitch creates a line of interlocking loops that resembles a chain. It is worked by bringing the needle up through the fabric, then inserting it back near the same point and bringing it up again a short distance away, with the thread looped under the needle. The resulting loop is secured by the next stitch, and the process repeats. This stitch can be used for outlines, borders, stems, and decorative lines. Its looped structure gives it a slightly raised, textured appearance that differs from the flat line of a backstitch. The chain stitch can also be worked in rows to fill areas, though this requires more planning to keep the rows aligned.
Diagrams for the chain stitch typically show the loop formation step by step. The first diagram shows the needle emerging and the thread looped beneath it. The second shows the needle reinserted to secure the loop. The third shows the completed chain. Because the chain stitch involves a loop, maintaining even tension is important. If the loop is too tight, the chain may appear pinched; if it is too loose, the loops may be uneven. Practicing on a straight line helps build consistency before attempting curves. Curves can be managed by adjusting the spacing and angle of each loop, but they may require more attention than a straight line.
Fabric choice influences how the chain stitch sits. On medium to heavy fabrics, the loops tend to stand out clearly. On lightweight fabrics, the weight of the thread may cause the fabric to pull or dimple. Using a stabilizer or a lighter thread can help in those situations. The chain stitch also interacts with the direction of the fabric weave. Working along the grain may feel different from working across it, and some embroiderers find that one direction is easier to control. Like the other stitches discussed here, the chain stitch can be combined with backstitch, satin stitch, and French knots to create layered compositions.
Choosing Stitches and Fabrics Together
These four stitches are often taught together because they cover a range of functions: the backstitch for lines, the satin stitch for filling, the French knot for texture, and the chain stitch for loops and outlines. When planning a project, it can be helpful to consider how these functions might work together. A design might use a backstitch for the outline of a leaf, a satin stitch to fill the leaf, French knots for small berries, and a chain stitch for a stem. This kind of combination allows each stitch to contribute its particular quality to the overall piece.
Fabric selection is another part of the planning process. Tightly woven fabrics such as cotton, linen, and some blends tend to provide a stable surface for many stitches. Looser weaves and stretchy fabrics may require adjustments in tension, needle size, or thread weight. Testing stitches on a small sample of the intended fabric can reveal how the thread behaves and whether any stabilizer is needed. This step is not mandatory, but it can reduce surprises during a project. Because fabric and thread interact in complex ways, sampling is a practical way to gather information before committing to a larger design.
Diagrams remain a valuable reference throughout the learning process. They offer a visual map of the needle’s path and the thread’s position, which can be difficult to describe in words alone. Many embroiderers keep a collection of diagrams for reference and return to them when trying a new stitch or a new fabric. Over time, the combination of diagrams, practice, and observation can build a personal understanding of what works in different situations. The information here is intended as a starting point, and each embroiderer may develop preferences and methods that suit their own projects.